Dilution Tips
Step One: Please ensure that your clear tubes have been primed. (Not sure if they are primed properly? Watch this video.
Step Two: Familiarize yourself on how the dilution dials work.
- When the valve is completely closed (light gray knob turned all the way clockwise), there is no shampoo concentration and instead, only pure water is allowed to flow through the system.
- When the valve is completely open (light gray knob turned all the way counterclockwise), there is full shampoo concentration, meaning there is the maximum amount of shampoo in the water.
- Please note that the light gray knobs can spin 1 and 3/4 turns. Never use your BatherBox with the light gray dilution knob all the open for any period as you will lose product very quickly.
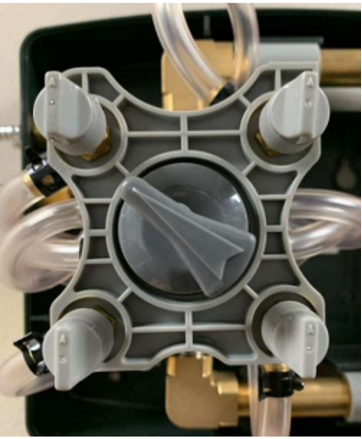
Step Three: Prep your BatherBox settings
- Start with the light gray knobs turned all the way clockwise, or off.
- Each of the four small light gray knobs should be at the 12 o’clock position.
- Turn the light gray knobs for products #1 - #3 counter-clockwise ¾ of a turn which should put the arrow at the 3 o’clock position.
- Turn the fourth knob (only if using the BatherBox GoToConditioner) counter-clockwise a ¼ turn which should put the arrow at the 9 o’clock position. If you are using a shampoo product, repeat step #3.
- Due to the variance in water pressure between facilities, this is a starting point, and you may need to make adjustments to reach your desired dilution.
Please make sure when installing your BatherBox that the shampoo is located below the bathing system on a rack or shelf. The system will not function correctly if the gallons are left on the floor. Installing the shampoo above the BatherBox will result in a suction effect that causes shampoo to leak into the tub.
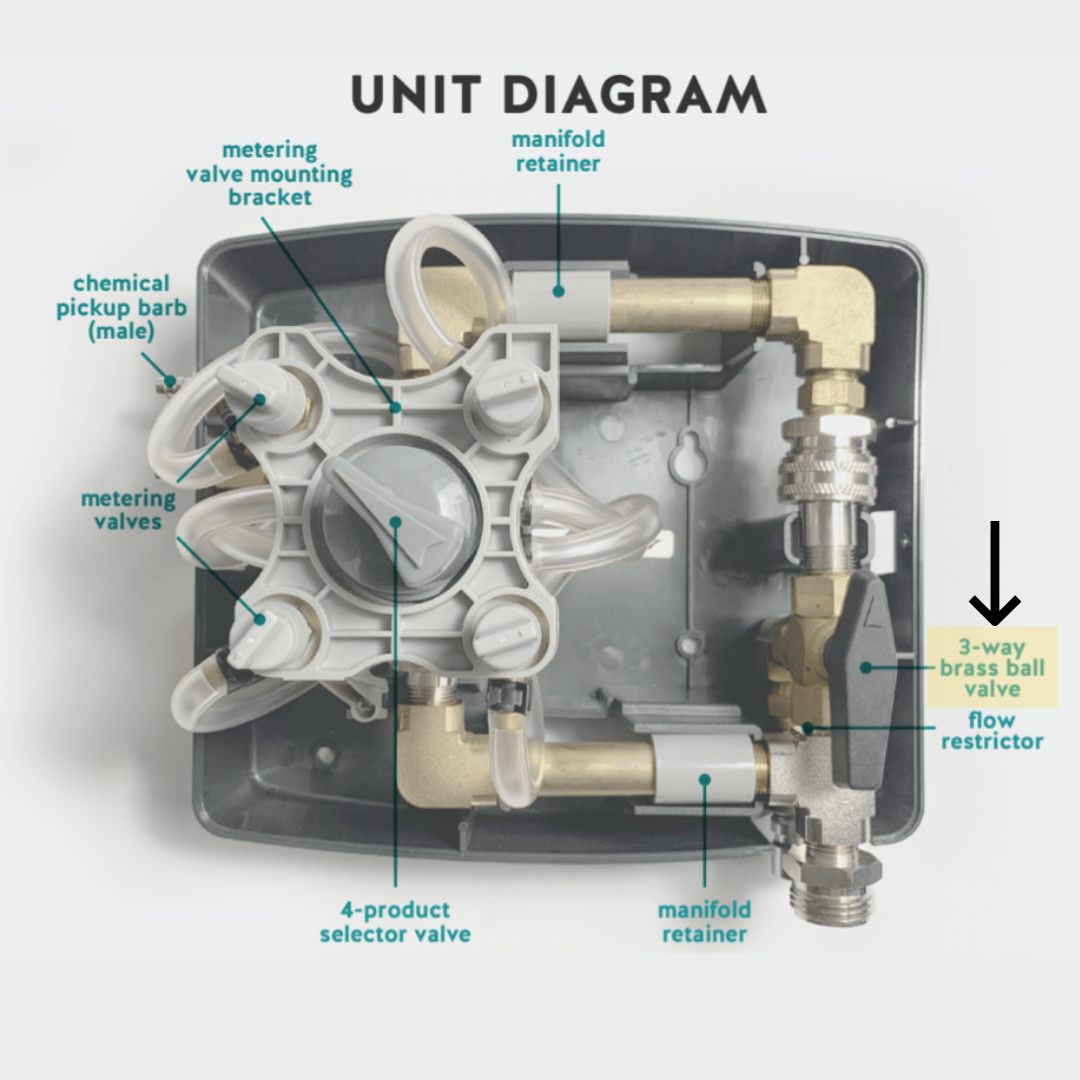
Please install the components in the orientation below. If you need help troubleshooting your system, please call Groomer's Choice at (888) 364-6242 and request to speak to your Account Manager.

Shampoo should be placed below unit
We carry a four-product wire rack and hanging hardware kit to mount your shampoo to your tub. Learn more.
Hang up the hose when finished
Be sure to hang up your hose after you turn off your unit so left over shampoo and water in the tubes do not leak into the tub.
BatherBox Product Rack Mounting Instructions
While some groomers choose to mount their wire shampoo racks to the wall, we offer an alternative solution for mounting directly to the side of the tub.
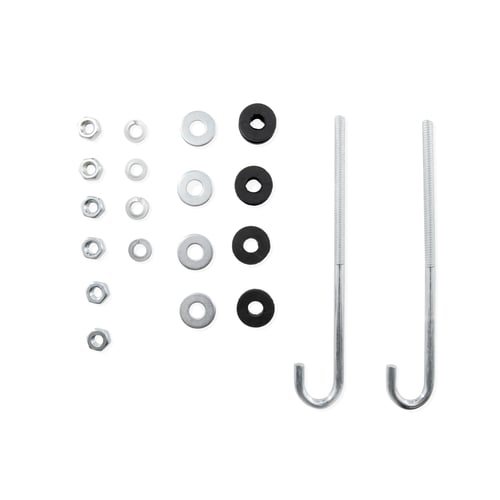
Our BatherBox Rack Mounting Kit includes:
- (2) 6” long x ¼” J-hooks
- (4) ¼” Split washers
- (4) ¼” solid washers
- (4) ¼” solid washers
- (4) ½” Hole x .125” Thick, .312” ID Rubber Grommet
- (6) ¼” nuts
Remove the 2 allen head bolts, nuts, and washers from either the left or the right backsplash panels.
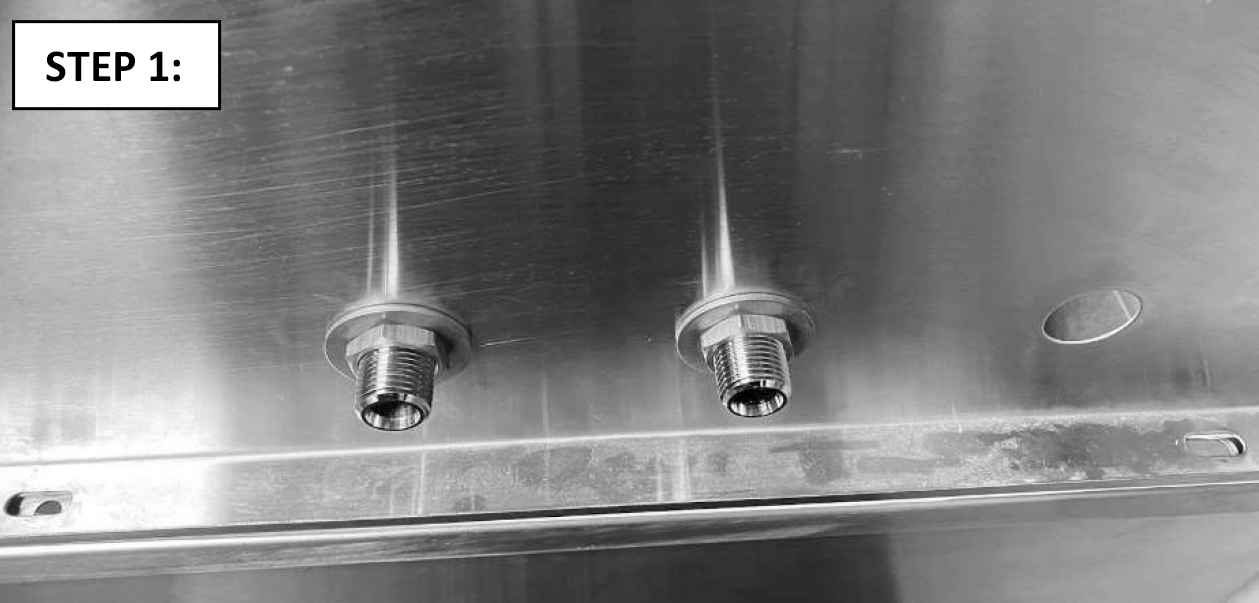
Remove the 2 allen head bolts, nuts, and washers from either the left or the right backsplash panels.
Insert the J hook (D), two nuts (A), and a solid washer from thee bottom of the tub and backsplash holes.
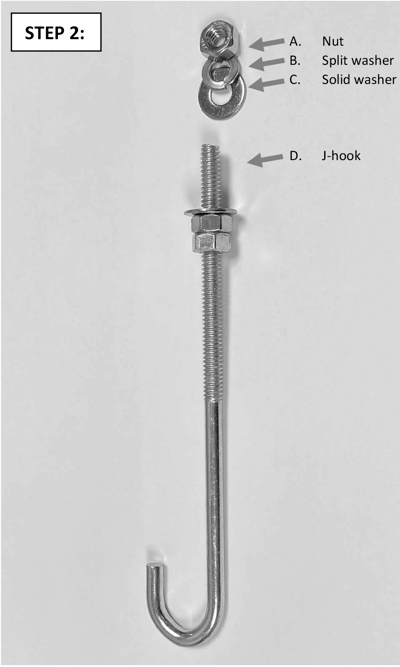
Insert the J hook (D), two nuts (A), and a solid washer from thee bottom of the tub and backsplash holes.
From the top, add a solid washer, split washer (B), and then secure the final locking nut. Repeat for the other side.
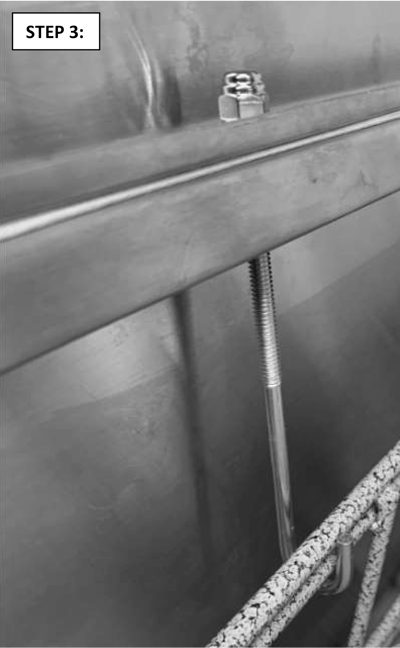
From the top, add a solid washer, split washer (B), and then secure the final locking nut. Repeat for the other side.
Take the 4 sliced grommets and install them on the bottom horizontal bar of the shampoo rack to minimize abrasion to your tub.
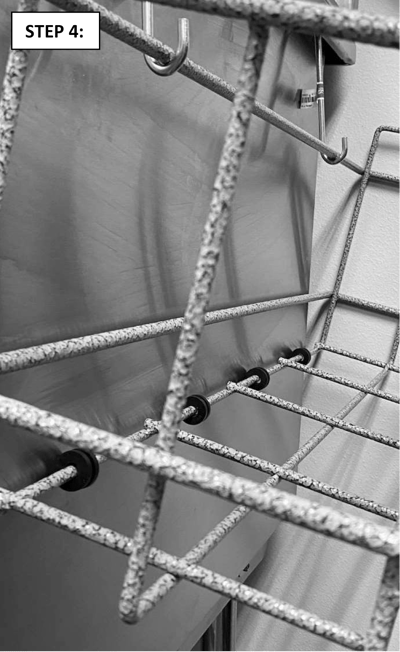
Take the 4 sliced grommets and install them on the bottom horizontal bar of the shampoo rack to minimize abrasion to your tub.